Welcome to Marq
This article walks you through (1) how to set up your first Marq document and (2) the basic components of the Marq editor.
Jump to a section
Create a New Project
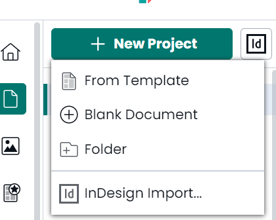
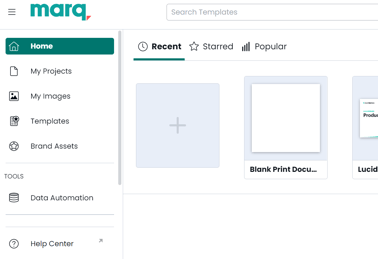
Log in to Marq and click "My Projects" on the left. Click the blue "New" button to start a Project from scratch, a template, or from InDesign. For practice, open up a Marq Project by trying the Interactive Tutorial.
If you choose a template, our template gallery includes everything from business cards and magazines, to banner and social media ads.
Your next step to getting started is familiarizing yourself with all the components of the Marq editor so you know exactly where to find all the handy tools at your disposal.
The Menu Bar
Located at the very top of the editor, the Menu bar shouldn’t look too unfamiliar. The buttons here provide access to the most common actions and objects you’ll need to complete your Marq Projects.

Many options that are performed through the Menu bar can be duplicated on your canvas with keyboard shortcuts, known as hotkeys. These shortcuts are indicated within each drop-down menu.
The Menu bar also includes a green folder icon. This button takes you back to your Projects. You can rename your Project by clicking on the Project title next to the green folder.
The Content Bar
To the far left of the canvas is what we call the content bar. Here you will see a number of icons that indicate the various objects (text, shapes, images, tables, and more) that you can add to your Project.

Page thumbnails
You’ll also find page thumbnails on the left side of the screen, to the right of the content bar. If you don’t see the thumbnails, simply click on the Pages button to expand the panel out.
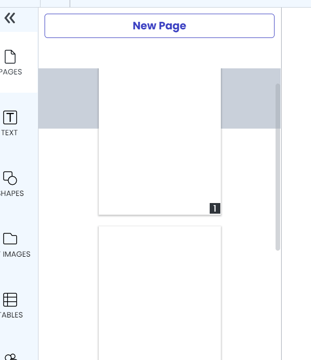
Here you can:
- Click on a page thumbnail to navigate to that page.
- Drag and drop pages to change the order in which they appear.
- Right-click or use the "Page" menu across the top to:
- Duplicate the selected page
- Insert a new page
- Delete the selected page
- Make the page a template for other pages in the Project
- Copy or paste the page
- Lock or unlock the page
The Context Pane
The context pane is located to the right of the canvas and contains all the settings you need to edit your Projects.
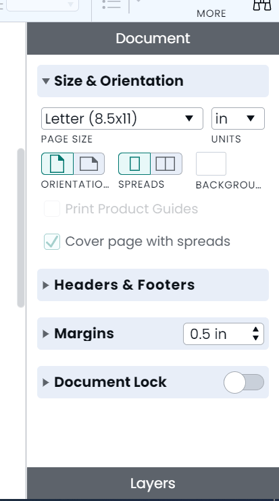
The tabs within the context pane will differ depending on which object on your canvas is selected. If you’ve selected a text box, for example, the Text, Style, and Layout tabs will appear. If you’ve selected an image, the tabs Image and Layout will appear.
Here’s a breakdown of all the possible tabs you may see on your context pane:
- Page - Change the size and orientation of your page, header & footer, margins, and background. You can also lock down the entire page here. See our Page Settings tutorial for more information.
- Layout - Change the position, size, and rotation of objects as well as their arrangement in the Project. You can use the “Align”, “Match Size”, and “Distribute” options to make objects the same size, align them to a certain section of the Project, or distribute them along a horizontal or vertical line.
- Text - Adapt paragraph styles, font, color, formatting, size, alignment, lists, spacing and padding, columns, tabs and indentations, horizontal rules, warp, and hyphenation. You can also upload custom fonts! See our Edit and Format Text turtorial for more information.
- Style - The Style tab opens in conjunction with the Text tab and only works on text boxes. The Style tab allows you to change the fill of a text box to a color, gradient, or image, and to change the border color. You can also change the shadow as well as the opacity of the text box.
- Scroll Area - The Scroll Area tab allows you to change the background color, margins, and bottom padding of a scrolling area. You can drag content onto the scrollable area just as you would the rest of the page. This feature is for digital Projects only.
- Image - Here you can scale, stretch, tile, or crop your images. It also gives you the option to change the saturation, contrast, brightness, border color, rotation, shadow, and opacity of your images. See our Add and Format Image turtorial for more information.
- Video - At present, the Video tab only shows a place to insert the URL of your video, but more options will be available here down the road. To use your own video content, you must first upload your video to YouTube or another storage site, such as Dropbox, with privacy set as either public or unlisted.
- Shapes - The Shapes tab allows you to change the fill, border color, shadow, and opacity of a shape.
At the very bottom of the context pane is the layers pane, which shows you every single object you’ve put on your canvas. Here you can hide or show various shapes by clicking the 'eye' icon to the left of the layer's name.
The Canvas
The canvas is the very heart of the editor. This is where you drag objects to build and design beautiful print and digital Projects.
On the canvas, you can:
- Change the title of your Project (the gray text located above your Project)
- Customize background styling
- Right-click to add vertical and horizontal alignment guides
- Edit and resize elements
Sharing options
If you don’t see the row of buttons in the top right corner of your editor, simply click on the grey share button to expand them out.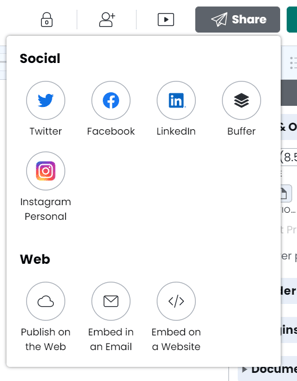
- Preview - The Preview button allows you to see how your Project will look if you were to publish it now.
- Share - The Share button allows you to share the Project with others on Marq. You can also publish your Project to the web, or distribute your Project on other sites.
- Download - The Download button allows you to download a .jpg, .png, or .pdf of your Project.
- Order Prints - The Order Print button allows you to order paper prints of your Projects and have them shipped straight to your door.