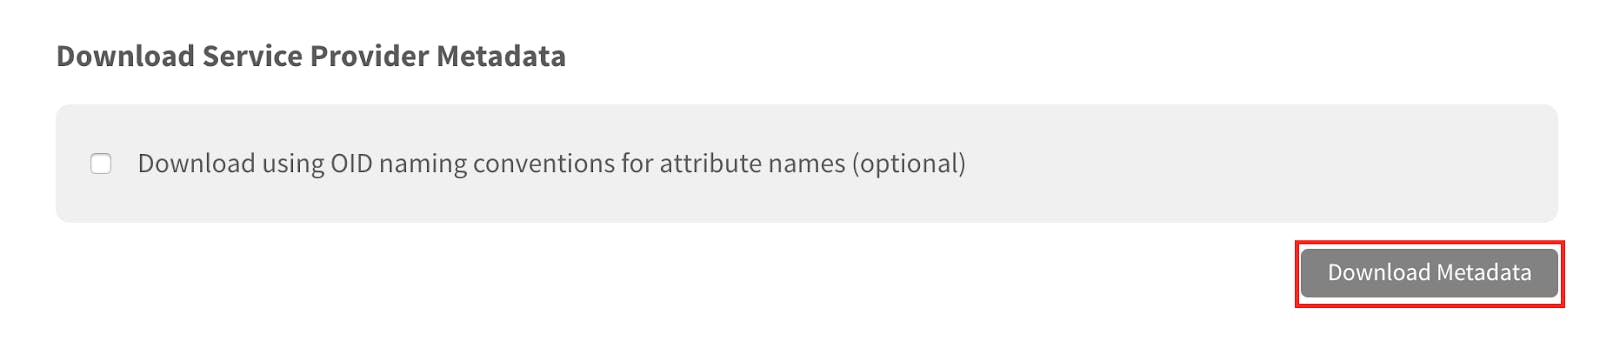
- From the Marq SAML page, select “Download Metadata” to download the Marq metadata. Save the metadata in a location accessible to the ADFS server. (Note: If the url in the browser starts with https://app.lucidpress.com when you download the metadata, there is one extra step you need to take in step 4)
-
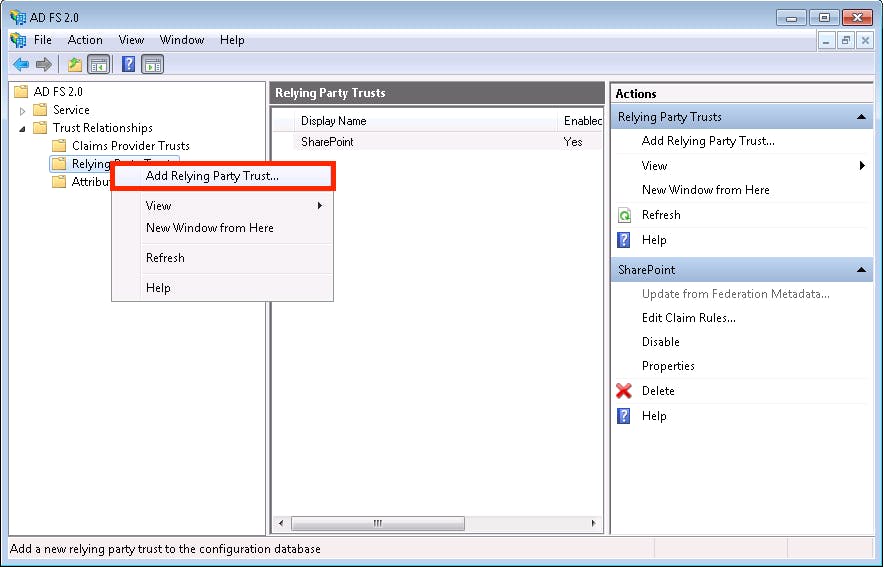
Open ADFS and right click on “Relying Party Trust.” Select “Add Relying Party Trust” from the menu to open the Add Relying Party Trust Wizard.
-
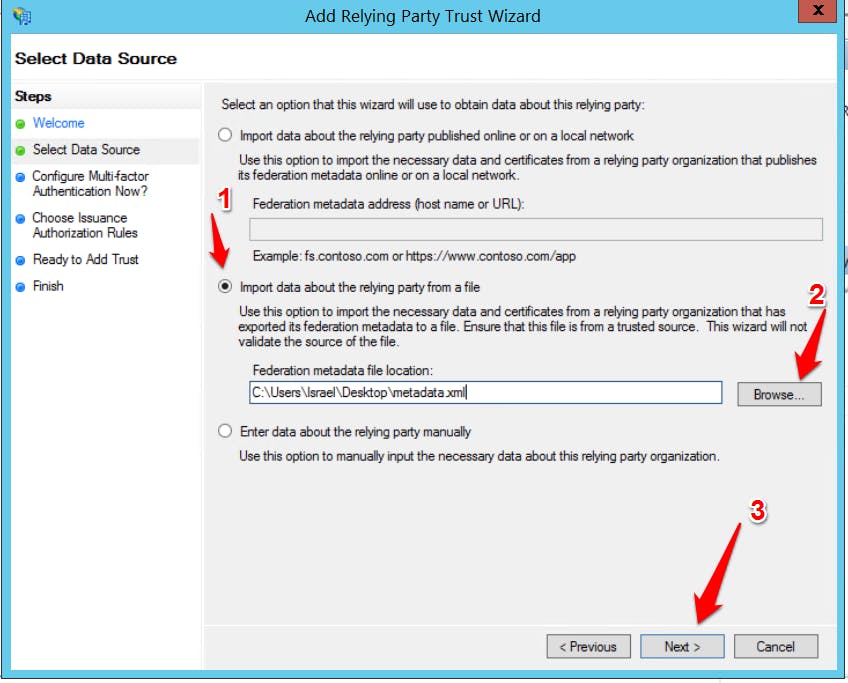
Click through the Welcome screen. On the Select Data Source screen, select “Import data about the relying party from a file.” Choose “Browse” and locate the Marq metadata file. Complete the remaining settings based on your organization's preferences.
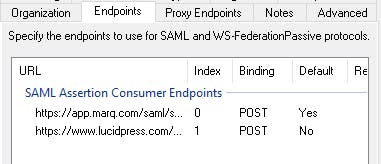
- Open the Endpoints configuration for your Marq relying party trust. You will need to add another endpoint to accommodate for ADFS storing the incoming sign-on URL against the supplied ACS/reply URL. The settings should be:
- Type = SAML Assertion Consumer
- Binding = POST (if you use REDIRECT only please contact support)
- Index = 1
- Trusted URL = https://www.lucidpress.com/saml/sso/[Your_Domain]
- Once finished the configuration should look like this:
If you downloaded the metadata from step 1 from a url that starts with https://app.lucidpress.com, you will need to edit the existing endpoint at index 0 and change the following:- Trusted URL = https://app.marq.com/saml/sso/[Your_Domain]
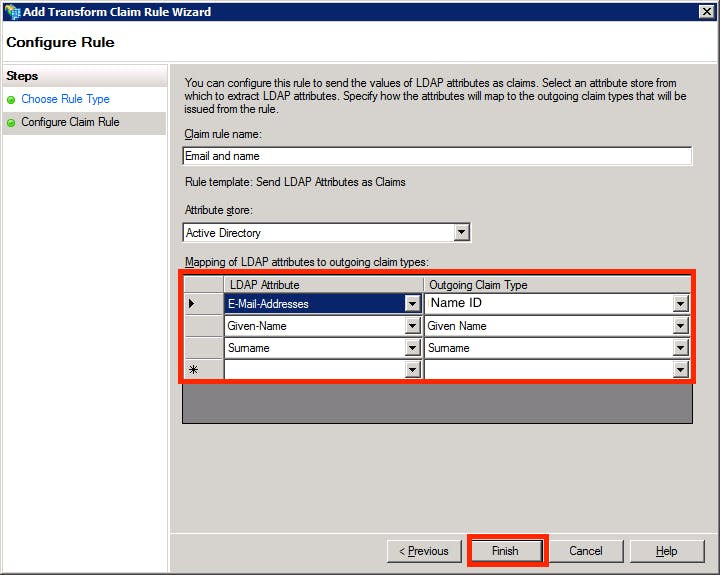
- Right-click on the Marq Relying Party Trust and select “Edit Claim Rules.” Add a claim rule using LDAP and configure the claim rule to match the attributes and claim types shown below. Then click “Finish.”
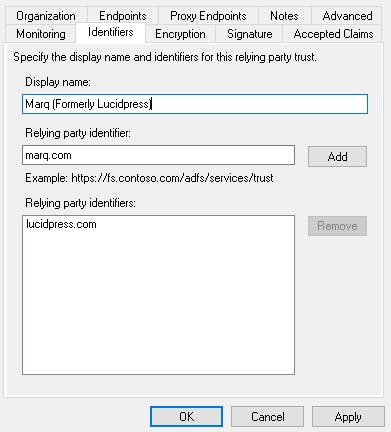
- Open the Identifiers configuration for your Marq relying party trust. You will need to add another Relying party identifier: marq.com

Azure specific instructions
- Go to Azure Active Directory -> Enterprise Applications and click on the Lucidpress application you created previously
- Go to Single sign-on
- Click on Edit in the Basic SAML Configuration box
-
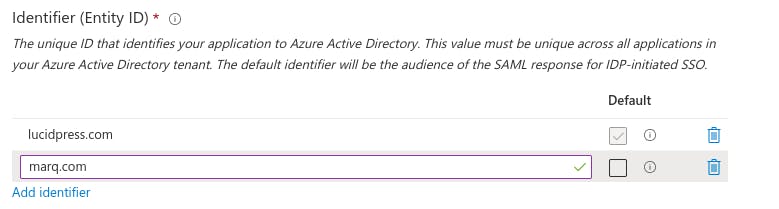
Add marq.com as a new Identifier (Entity ID) but leave the old lucidpress url as the default until after the deadline.
-
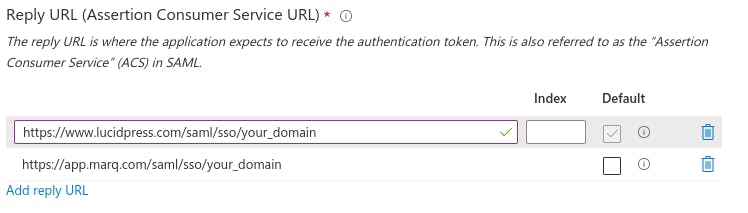
Add a new URL (https://app.marq.com/saml/sso/[Your_Domain]) to Reply URL (Assertion Consumer Service URL) but leave the old lucidpress url as the default until after the deadline.
-
Change the “Sign on URL (Optional)” field to https://app.marq.com/saml/sso/[Your_Domain]

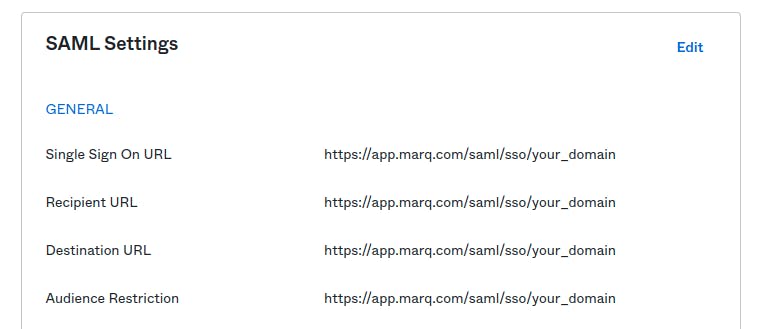
Okta
-
Change all the URLs under SAML Settings to use https://app.marq.com/saml/sso/[Your_Domain]
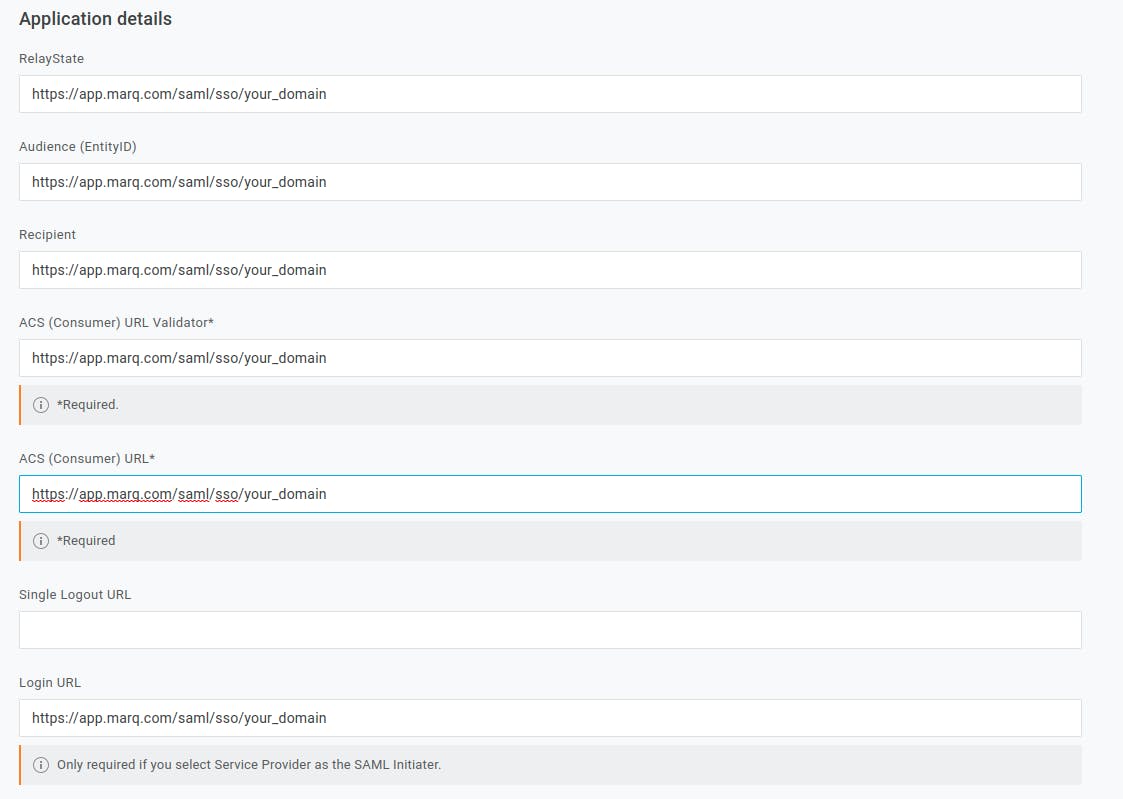
OneLogin
- Update all URLs in Configuration -> Application details to use https://app.marq.com/saml/sso/[Your_Domain]
Optional Instructions for ADFS if you don’t want to create a new app
-
From the Marq SAML page, select “Download Metadata” to download the Marq metadata. Save the metadata in a location accessible to the ADFS server. (Note: If the url in the browser starts with https://app.lucidpress.com when you download the metadata, there is one extra step you need to take in step 3)
- Run the following command in Powershell as admin:
Update-AdfsRelyingPartyTrust -TargetName '[app name]' -MetadataFile '[full path to metadata file]'
- Open the Endpoints configuration for your Marq relying party trust. You will need to add another endpoint to accommodate for ADFS storing the incoming sign-on URL against the supplied ACS/reply URL. The settings should be:
- Type = SAML Assertion Consumer
- Binding = POST (if you use REDIRECT only please contact support)
- Index = 1
- Trusted URL = https://www.lucidpress.com/saml/sso/[Your_Domain]
-
Once finished the configuration should look like this:
If you downloaded the metadata from step 1 from a url that starts with https://app.lucidpress.com, you will need to edit the existing endpoint atindex 0 and change the following:-
Trusted URL = https://app.marq.com/saml/sso/[Your_Domain]
-
-
Open the Identifiers configuration for your Marq relying party trust. You will need to add another Relying party identifier: marq.com