
Connecting to Xpressdocs will allow you to have a direct integration from project export to ordering your prints through Xpressdocs' print service. Please reach out to your customer success manager to begin.
Step 1: Contact your customer success manager
Contact your customer success manager. They will set up a 'kickoff' meeting between you, Marq, and Xpressdocs. If you do not know who your customer success manager is, please reach out to support@marq.com.
Implementation overview:
- If you are an existing Xpressdocs customer, set up is pretty simple. The biggest thing to manage is making sure both systems are using matching agent and company IDs. Plan on 2 weeks for set up.
- If you are new to Xpressdocs and just need XD core products and no special functionality or special pricing, we have created a generic XD-Lucid system. Marq can point you to that system, with no set up required by XD.
- If you require a private label Xpressdocs check out because you need account management, special products/features, pricing etc., then plan around 3 to 4 weeks for set up. XD will start work as soon as they are notified. XD does need to wait for Marq to be configured first.
Step 2: Match your templates to Xpressdocs
Start designing your templates to fit Xpressdocs's catalog specifications
Step 3: Receive a company ID from Xpressdocs
You should receive an email from Xpressdocs with your company id within a couple weeks. Please forward this to us when you receive it.
Step 4: Assign your users the company id and user id in a CSV upload to Marq
Upload a list of users into Marq each with an Xpressdocs user ID and company ID. The column titles in the CSV must be "User ID at Print Vendor" and "Office ID at Print Vendor" to match up in the system.
If the users are already in Marq, you can update existing users' information when you upload a CSV with their existing email and name.
User ID's - Can be an email or any other type of unique identifier of the user.
Company ID's - We recommend that you use a company name and zip code if you do not have a preferred internal ID. Example Myrealty80120. If you already have an existing Xpressdocs platform, please coordinate the IDs with your Xpressdocs account manager as we need them to match.
Step 5: Notify Marq to finish the implementation
Once you have completed the upload, we will do the final step to enable the Xpressdocs connection for your account so prints will go to the Xpressdocs printer. Once we enable the integration, all new print orders will go to Xpressdocs
Step 6: (Optional) Lock to a print product
If you wish to have your templates match to a specific Xpressdocs product or selection in Marq, you can convert your templates and lock them to an Xpressdocs key or print product.
Lock template to a print product
Permits your team to only order prints from a selected print product when converting or editing a brand template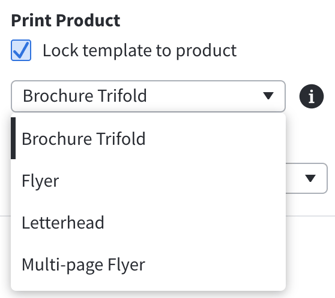
Step 7: Test
Templates must meet the size and page count specifications. If they do not match up, there will be an error or the print option will not show in the order prints flow.
Step 8: Go live
Notify your users and have them start ordering prints
If you have any print issues, please contact info@xpressdocs.com. Design related issues will be handled through support@Marq.com. In some cases, both Xpressdocs and Marq should be included in a conversation if there is a template compatibility issue or error message when passing projects through to Xpressdocs from Marq.