Headers, footers, and page numbers
Use headers, footers, and page numbers to automatically place content in certain areas on all of your document pages
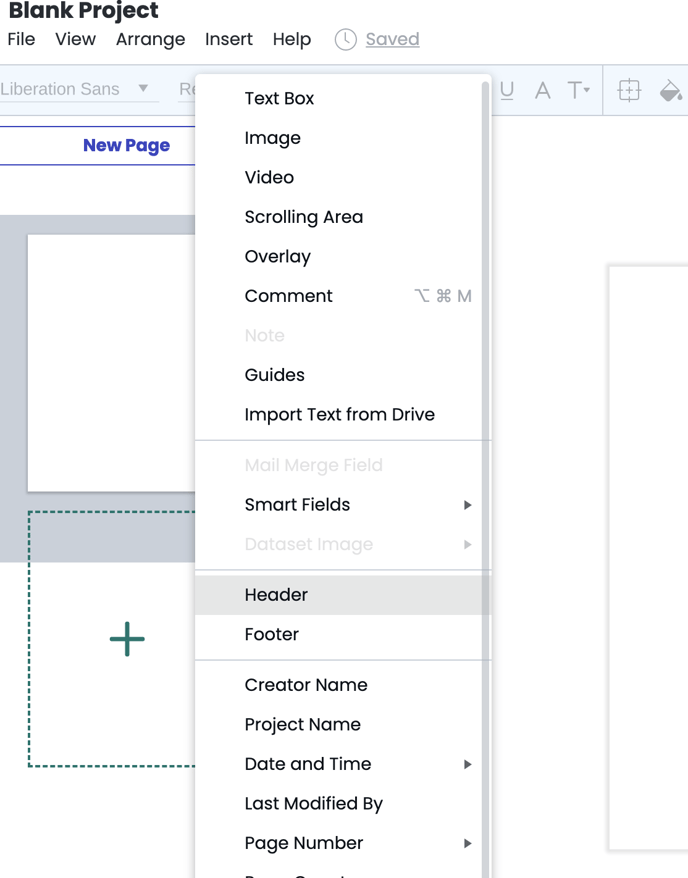
In the insert menu or underneath the size and orientation settings you will find the option to add a header or footer to your project. This feature must be applied to a project as a whole, so you will not see it if you are in the Page tab.

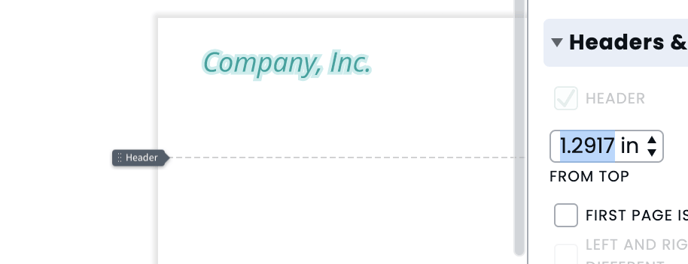
If you check the box next to "Header" or "Footer," an editable region will be added to the top or bottom of every page of your project. The region will be defined by a horizontal dotted line, visible when you hover your mouse over the top or bottom of the page. If you double-click in this region, a black bar will appear across the top of the canvas, and the dotted line will remain selected, indicating that it is in editing mode.

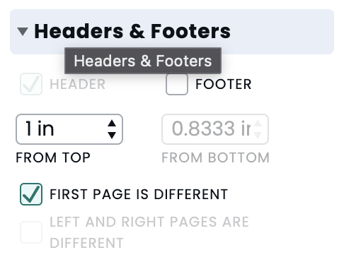
You can adjust this line’s distance from the top/bottom of your project by clicking and dragging the header and footer tabs, or by typing a value into or toggling the arrows next to the "From Top" or "From Bottom" text boxes.

If you want different header/footer settings for different pages, you can select "First page is different" or "Left and right pages are different."


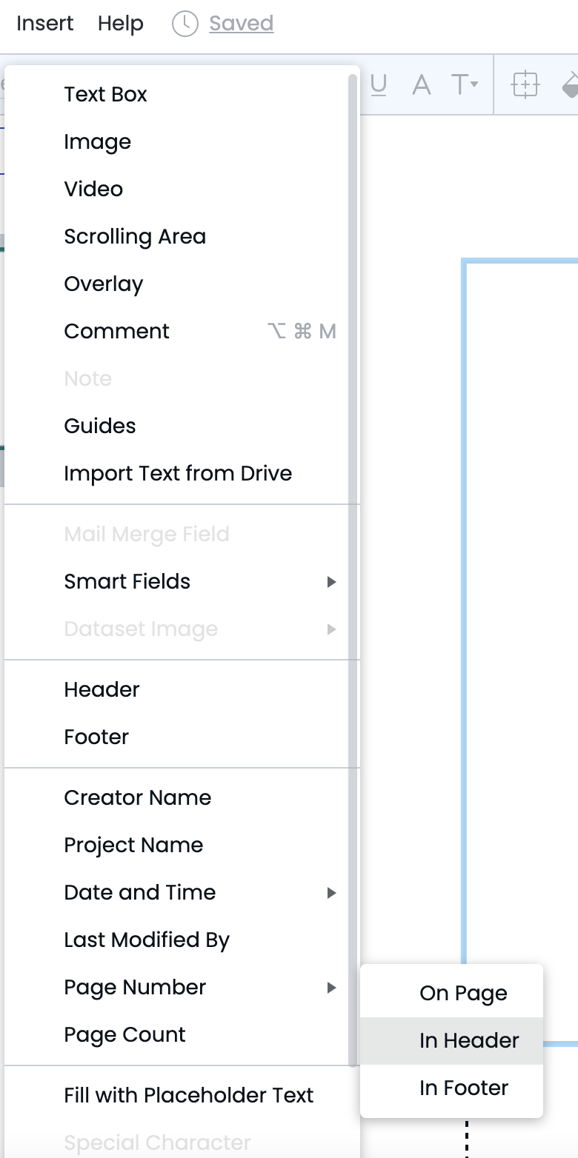
Anything that you put between the dotted line and the top/bottom of the project while in editing mode will become a part of your header or footer. This includes shapes, text boxes, page numbers, and other content. You can auto-fill your header or footer with linked content from the insert tab of the menu bar. See these content options below.
If you select “Page Number,” each page of your project will be populated with the corresponding page number. If you want your page numbers to begin on the second page of your project, make sure to enable "First page is different" in the context pane.

When you have finished editing your header and footer, press ESC to exit editing mode.