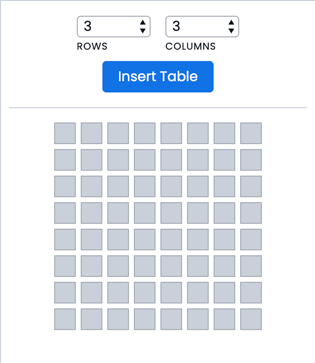
Add a table
Open the left content panel, click the Table button, and choose your row and column count. The table drops into your document automatically — you can adjust dimensions anytime.
Navigate and edit cells
Marq's table editor works like the tools you already know — Word, Google Docs, Notion.
| Action | Result |
|---|---|
| Click a cell | Enter edit mode |
| Tab | Move to the next cell (cursor ready to type) |
| Shift + Tab | Move to the previous cell |
| Arrow keys | Move through text; at the edge of a cell, jump to the adjacent cell |
| Double-click | Select the word under the cursor |
| Triple-click | Select the full paragraph |
Working with bullets inside a cell
- Enter on an empty bullet → exits the list and continues as plain text
- Backspace on an empty bullet → removes the bullet and continues as plain text
- Enter on a bullet with text → adds a new bullet line (same as expected)
Resize a table
- Proportional resize: Drag a corner handle
- Single row or column: Hover over the border until the resize cursor appears, then click and drag
Select cells
- Multiple cells: Hold Ctrl (Windows) or Cmd (Mac) and click each cell
- Entire row: Hold Shift and click the first and last cell in the row
Add or remove rows and columns
Select the table, then use the Table tab in the right panel — or right-click for quick access to table options. You can insert a row above/below or a column left/right, and delete rows or columns with the delete buttons.
Merge cells
Select the cells you want to merge, go to the Table tab in the right panel, and click Merge Cells.
Format cell fills
Select one or more cells and use the Table tab in the right panel to set a fill color. To apply alternating row or column fills, select the whole table and choose a smart fill option from the right panel.
Format text inside cells
Select your cells (Ctrl/Cmd + click for multiple), then use the Fonts section in the right panel to set horizontal alignment (left, center, right, justified) and vertical alignment (top, middle, bottom).
Format borders
Select what you want to change first, then pick the border type in the right panel:
- Remove the outside border: Select the table, choose the outside border option, and set it to 0 px
- Thicken a single row's border: Select that row, then adjust the bottom border
The key is selecting the right scope before changing the border style.
Using formulas
Tables in Marq support formulas. Learn more about using formulas →
Frequently asked questions
Do these changes affect my existing tables?
No. Styling and content in saved documents are unchanged. The new navigation behaviors apply the moment you enter edit mode on any table.
Does Tab work from the last cell?
Tab moves through cells within the table. From the last cell, it follows the editor's normal focus behavior — the table won't trap you.
Does this work on all table sizes?
Yes, all tables regardless of dimensions.
Is this available on all Marq plans?
Yes — it's a core editor interaction available on every plan.