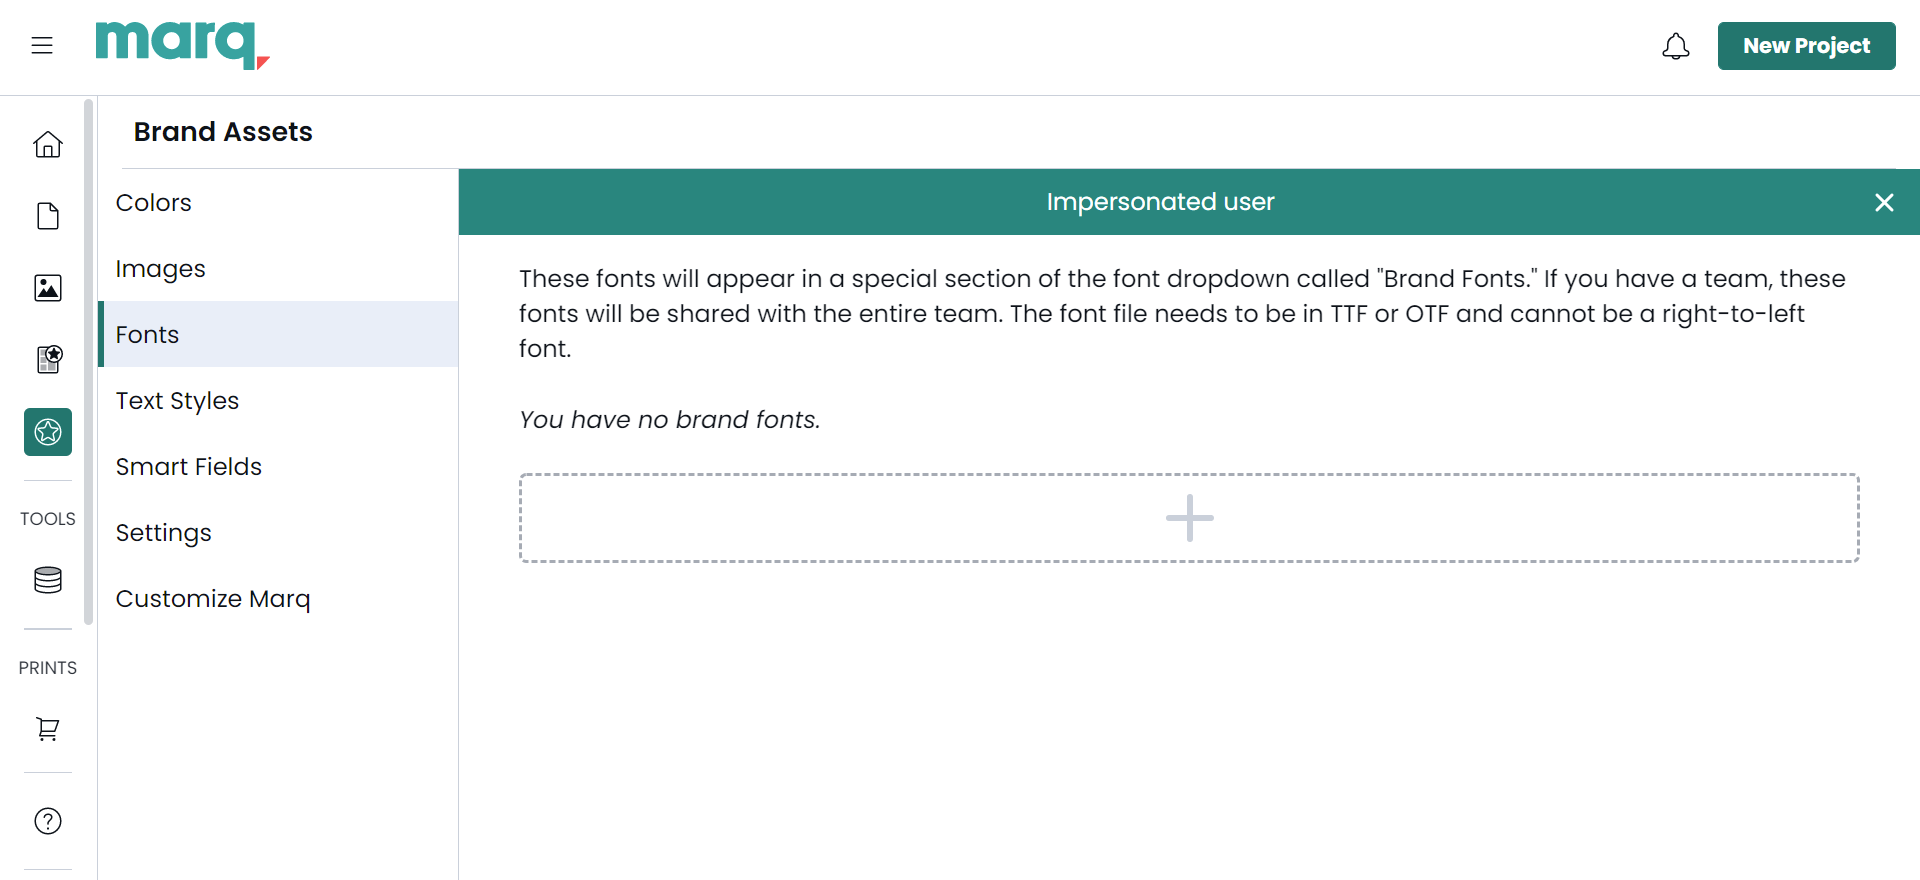
Add a custom font to your brand assets (will share will all team members)
Go to your brand assets > fonts and add the fonts. They will appear under 'brand fonts' in your font selection tool once you have done this.
Add a custom font to your font library (will only share with you)
Follow these steps to enable custom fonts:
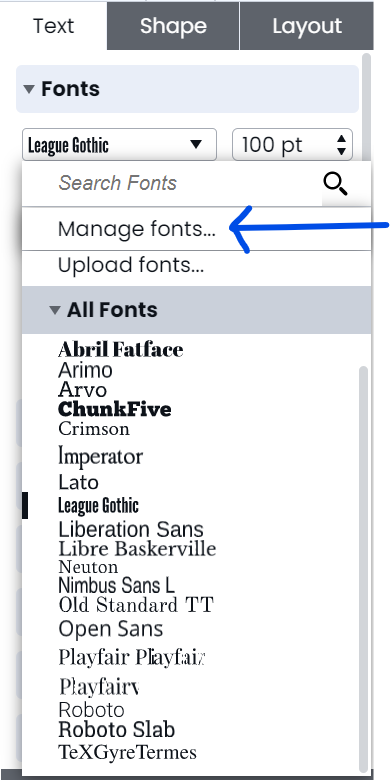
- Click on a textbox within your project. A “Text” tab will appear to the right of the canvas in the context pane. Click on the font selection menu and then “Manage Fonts”.
- In the Font Manager, you can view available fonts by category and enable fonts to be used in the editor by turning them on. To add custom fonts, simply click “Upload Font”, select the file(s) (.ttf, .ttc, or .otf) you’d like to add, and hit “Done”.
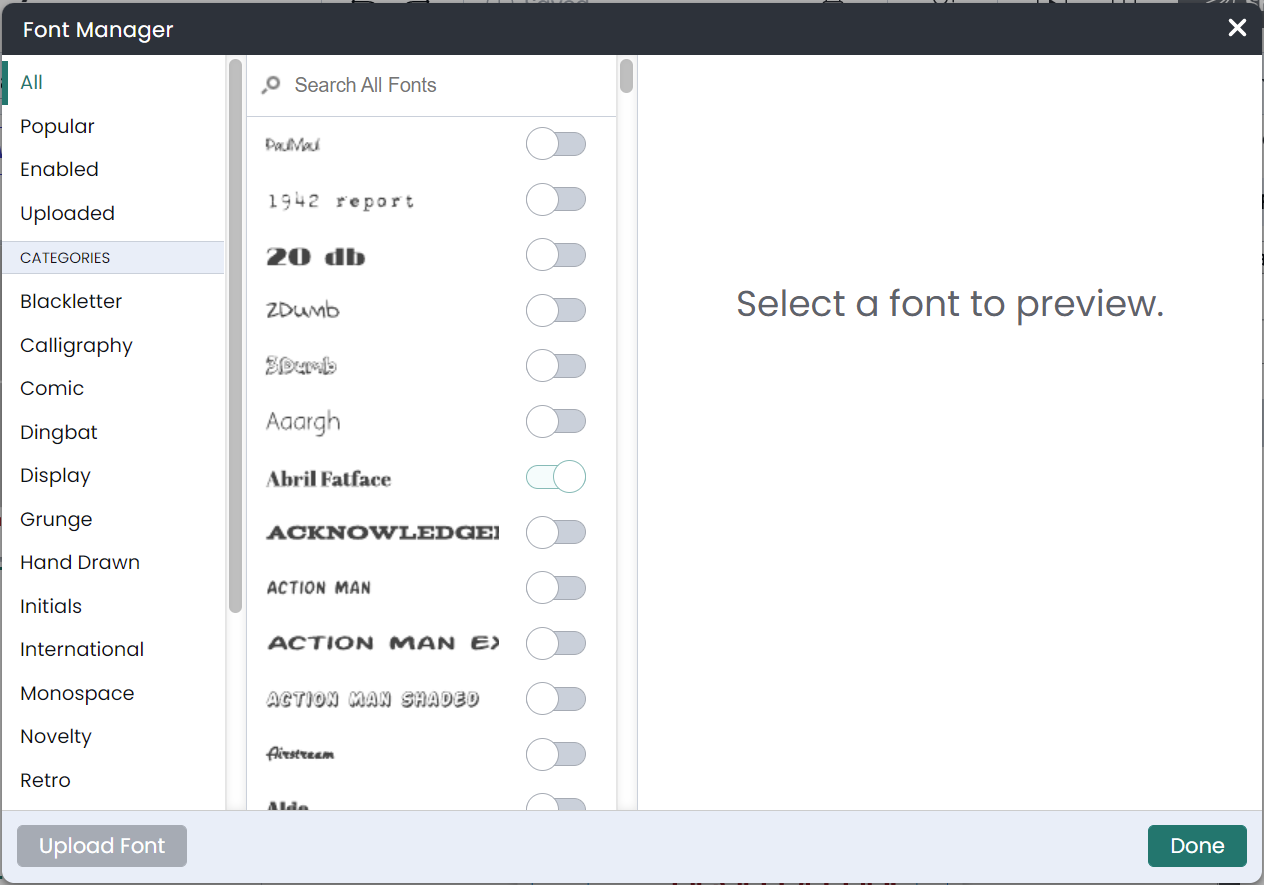 Keep in mind that font families (i.e. light, italic, or bold versions of a font) may be separate font files to upload into Marq.
You might notice that some font types, like Arial, are unavailable. We've provided a list of similar alternative fonts that are free to use in their place.
Custom fonts are account specific. If you are collaborating on a shared project, the custom fonts in the shared project need to be uploaded into each collaborator’s account so the font is visible for each and every collaborator.